Our house is approximately two and a half miles from town which doesn’t sound far, but it takes 15 minutes to get there because we’re on the side of a mountain in the wilderness. This means we’re not getting actual fiber anytime in the near future, if ever. Working remotely however requires reliable Internet, and if you’re like me and self-host services then you want one or more static IPs and the fastest connection you can get. This almost always rules out the local WISPs, Starlink, or 5G based carriers in most cases. I tried all of those of course but you’re getting maybe 100Mbit down and 20Mbit up if you’re lucky while paying a pretty penny for a small amount of bandwidth that’s stuck behind CGNAT. I wanted fiber speeds with a static IP so I had to take matters into my hands.
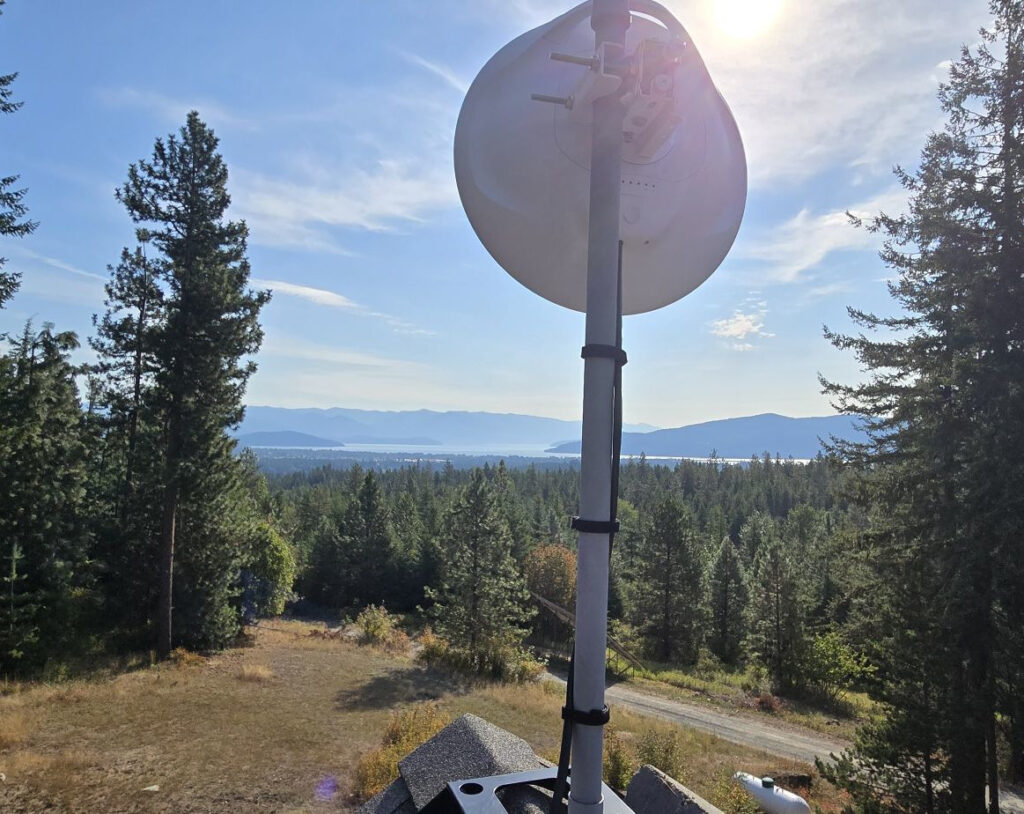
I’m a heavy user of Ubiquiti equipment, and they make it relatively easy to solve this problem. I say relatively because the devil is in the details. By leveraging their UISP ecosystem and a pair of Wave Pro 60GHz dishes, I was able to establish a >1Gbit bridge link over 4.1km to a location in town where I had business fiber installed.
Location, location, location
The first challenge was finding a suitable location in town where I could install equipment and have the fiber pulled. I spent over a year trying to find a business that would agree to roof access, but none of them were willing due to liability concerns regardless of any offers I made. After exhausting most of the possibilities from a line-of-sight perspective, I turned to an unlikely source. It just so happens that my barber’s house was in a suitable location and he was willing to let me run whatever I needed for the low, low price of free wireless Internet. That sounded like a deal to me and I jumped into action, ordering equipment and mapping out the implementation.

Per the documentation, it’s important to get the dishes linked and pre-configured before attempting to install them. For anyone else trying something like this, don’t skip this step!
Getting Fiber Installed
I called three different providers including Ting, Ziply, and Vyve. Both Ting and Vyve were servicing the address at the time, but Ting’s prices had recently gone up from around $150/m to over $600/m for business class. Vyve was offering a full 1Gbit symmetrical non-shared business fiber connection with SLA and static IP for $290/m, so I was planning for that. I wasn’t 100% sure at the time my scheme was going to work, and committing to this monthly cost for a 3 year contract was not an insignificant chunk of change. I negotiated with Vyve to first install a cable based connection which was 1Gbit down and 30Mbit up as the proof-of-concept, and could within 45 days of that installation convert it to the full blown fiber.
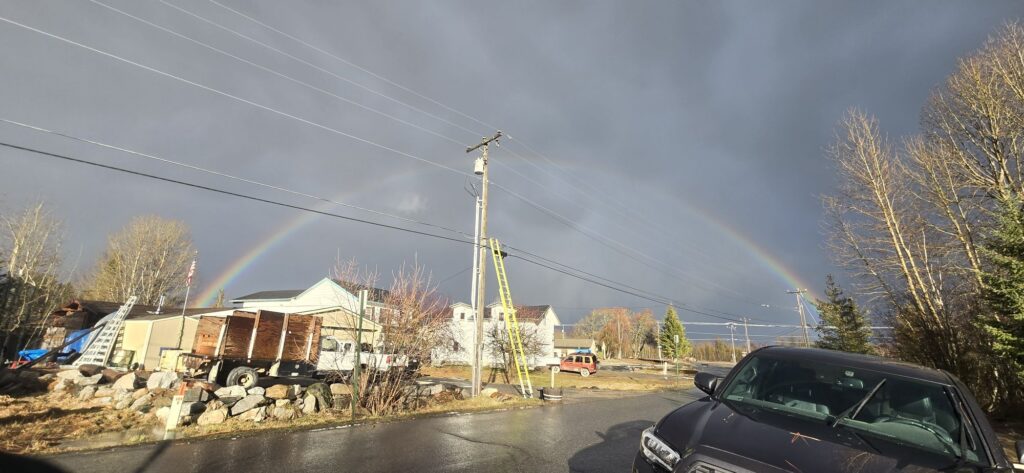
It was still Idaho winter when I placed the order in December 2023 so I had to wait until April 2024 when the ground thawed before they could run conduit and get the cable run installed. That was a particularly fun day because it was cold and hailing, but to their credit they came out and got it done. I took the rainbow as a sign I was on the right path.
Installing Equipment
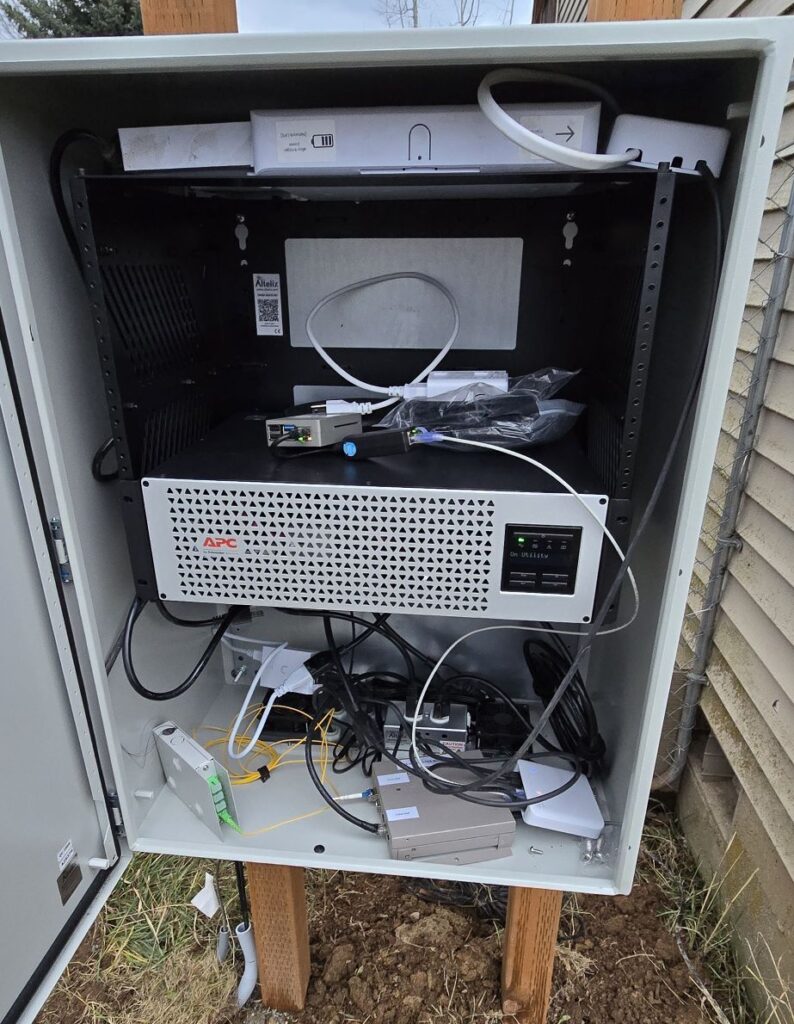
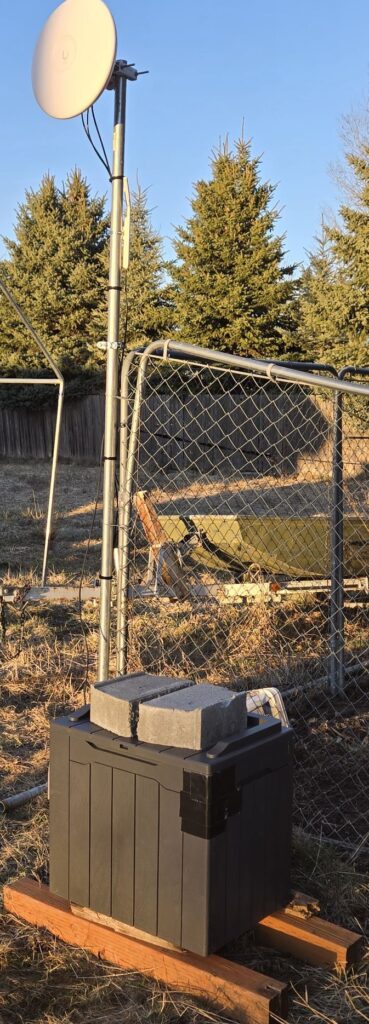
With the cable physically run, it was time to get my edge POP site equipment in place. I needed a box of some kind to house the necessary equipment, including the backup UPS + 12v battery, a PoE switch, the cable modem, and a Raspberry Pi lights-out monitoring node (pilom). I opted for a cheap 30 gallon deck box with some thin plywood for mounting and some silicon in the cracks to make it water tight. I cut a hole and installed a fan+vent and liquid tight conduit coupler for running wires through.

With all that done, I needed to mount the dish and wire everything up. I used an outdoor power outlet and heavy duty outdoor extension cord to get power to the box. I opted for a 10′ section of 1 1/2″ electrical conduit pipe and a metal ground screw, along with some wire wrapped around the corner of an existing aluminum fence. This was all of course temporary and done in a rush to validate the POC within the 45 day conversion period. The final outcome didn’t look pretty but was functional:
Alignment is harder than it looks
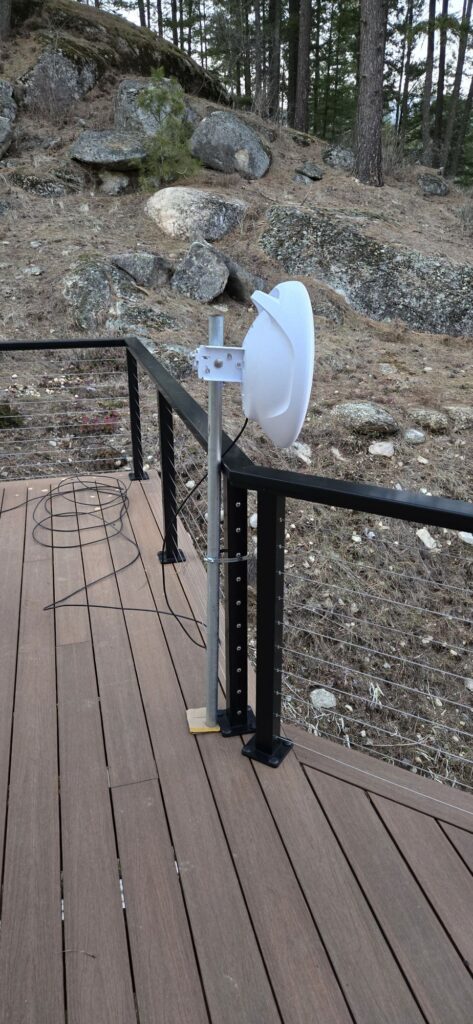
I had spent a lot of time using a high powered pair of binoculars to scope out where the barber’s house was relative to ours, along with using the UISP Design Center to determine coordinates and theoretical link performance. I could see his house from our deck, but from the other end it was a lot harder to orient the direction of our house, even when using a compass. I actually at one point had my wife out on the deck waving a flag so I could find it with binoculars. I was finally able to establish some landmark general direction, and proceeded with the alignment of the fiber-bridge. I had previously done a temporary mount on the deck for the house-bridge:
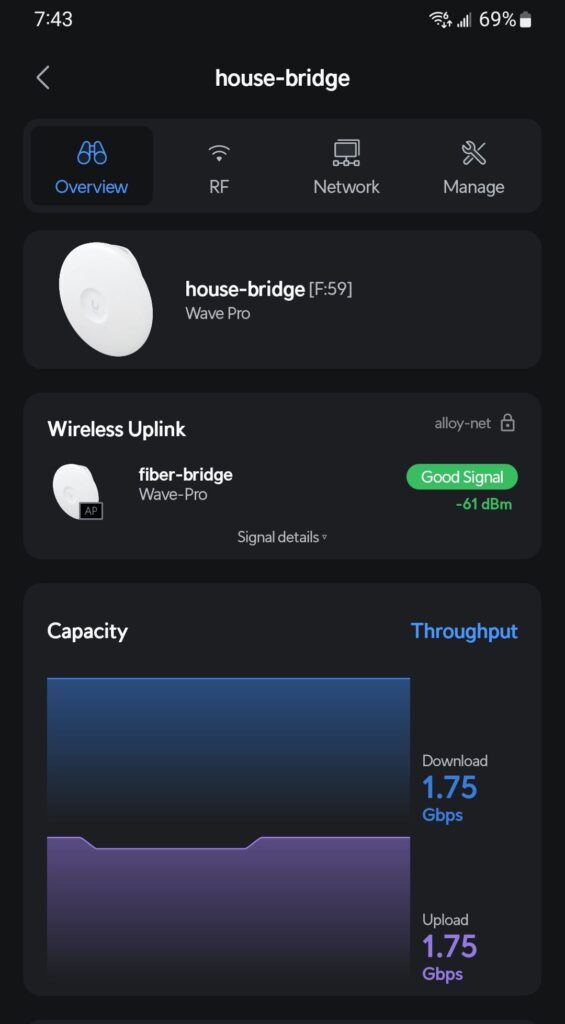
The UISP app has a built-in alignment tool that does make this process easier, and it includes an audible ping alert that helps with cold vs hot as you adjust direction left, right, up, and down. Using small adjustments starting at one end I was eventually able to get it dialed in, but it was a tedious process over the course of a few days. It was pretty exciting when the dishes linked up at over 1Gbit!
Line of sight is great, but height matters
The alignment above wasn’t perfect but it was functioning and completed the POC with proof this was viable. We enjoyed a few days of regular city folk Internet speeds with an occasional outage here and there. I did have a backup connection that kicked in, but needed to figure out what the glitches were. It didn’t take me long to remember the trains, as there is a train track that runs right by the barber’s house. Sitting out on the deck confirmed it, every time I saw a train through the binoculars with double-stacked containers I lost line of sight to the fiber-bridge dish. There was only one solution… more height! I proceeded to engineer a new pole mount since it was going to be a lot cheaper than getting a proper Rohn tower. I used a 21′ steel pipe which is stiffer and sways less in the wind. I had to get creative when it came time to mount the dish.
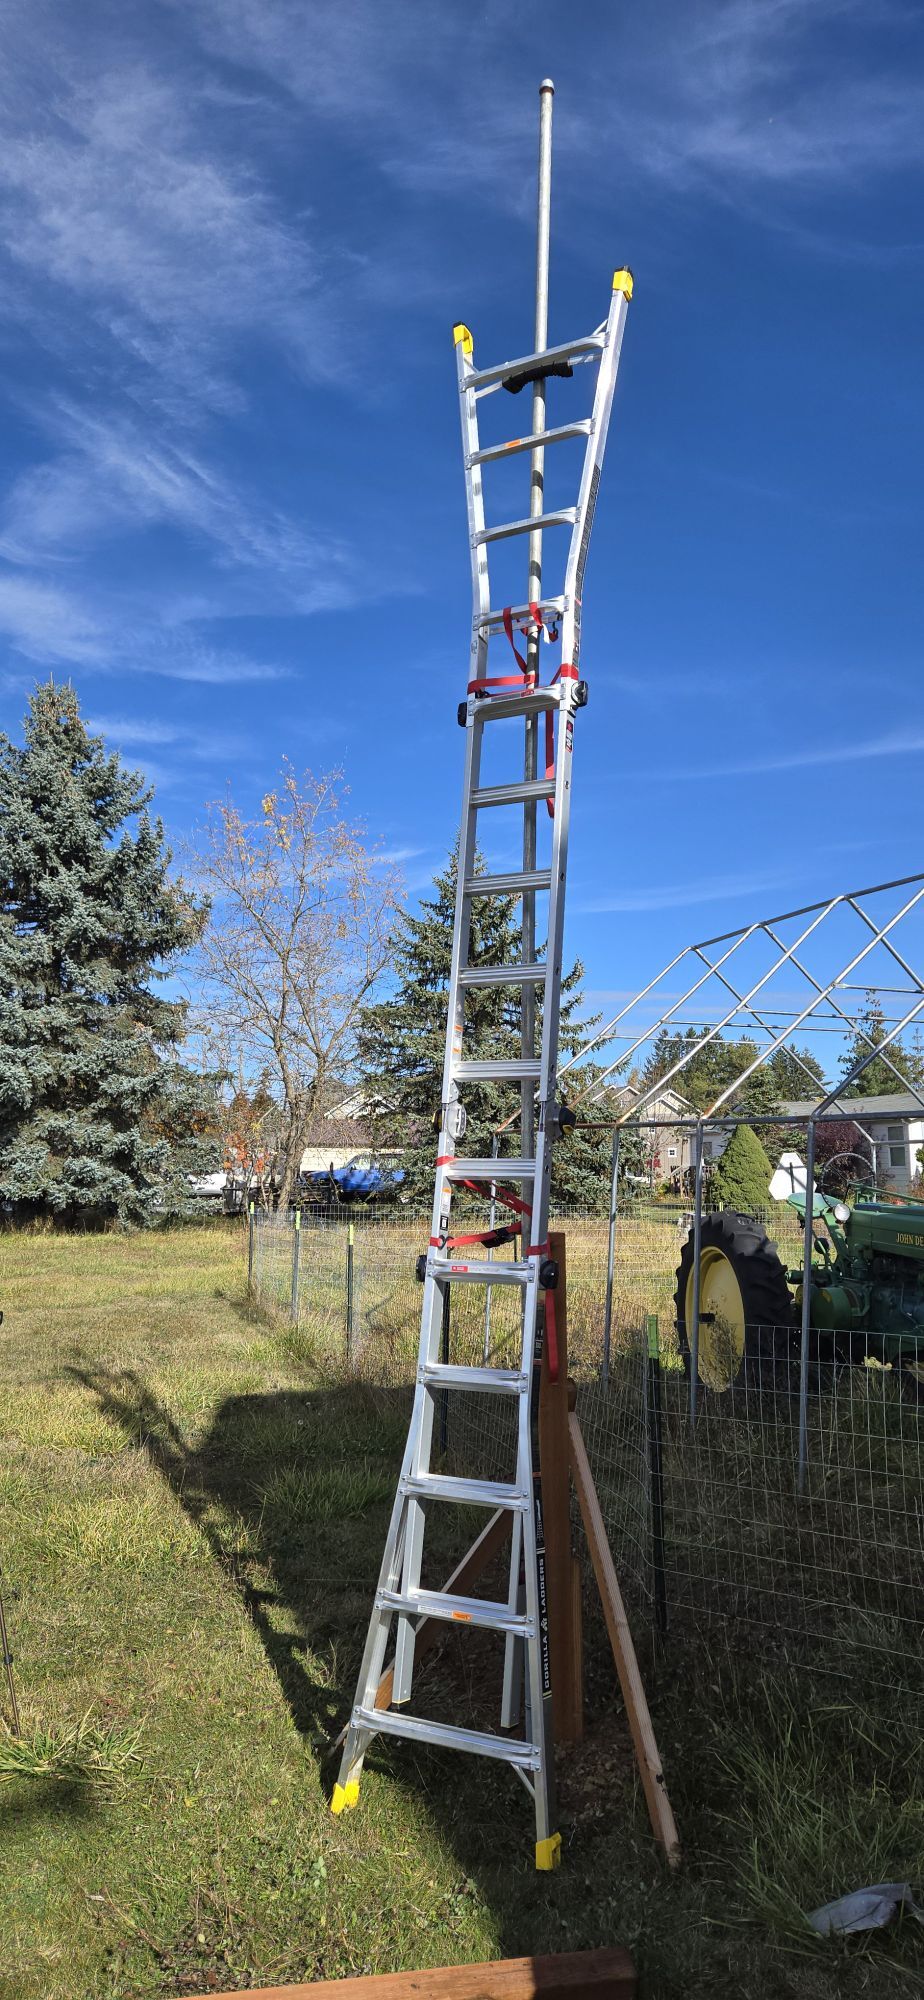
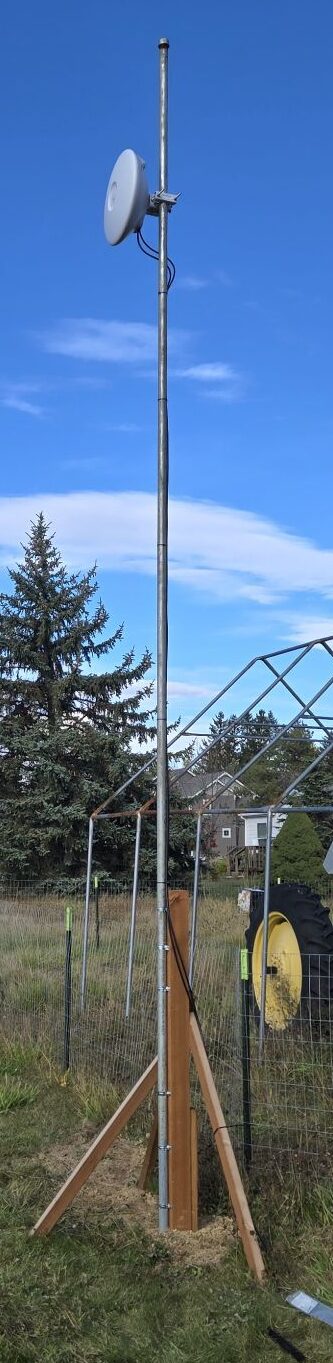
I don’t like climbing ladders like this or going up high in general unless there is solid ground under me, so that added to the fun. But it’s done now and the extra height fixed the drop outs, so it was well worth it. With the POC complete, I put in the request to convert to full fiber and a few months later it was installed and up and running. It’s been operating for over a year at the time of this post and has been solid outside of Vyve scheduled maintenance.
In November 2024 I made some additional upgrades, swapping out the deck box for a proper lockable metal rackmount enclosure and upgraded UPS. Nothing was really wrong with the deck box but it was close to the ground and I didn’t want a heavy snow year to cover it, or potentially have someone come and try to steal equipment out of it. I also moved the house-bridge from the temporary deck mount to a modified roof ridge mount. Aside from needing to tidy up the insides of the box at some point, I consider this a very successful project and am pleased with how it turned out and is working. Success is measured by the fact that it passes the WAF and my son approves from a gaming latency perspective. And most importantly, the barber says “You’ve made Internet great again!”.